In my last column for Trndy Indy I wrote about the great brewing hobby shop Great Fermentations. I’d visited it many times before in the past because a group of buddies and I get together once in a while to try our hand at making beer. Sometimes the results are outstanding! Other times, two months of work ends up tasting like dish soap (my first attempt). In any case, the first Saturday in May is National Homebrew Day, so my brew group got together to try and make something good.
Step 1: Planning and Purchasing
The group had no idea what type of beer we wanted to brew. There are a few limitations in terms of what style of beer we could make (we can’t do lager because it uses cold-fermenting yeast), but we still wanted to try something new. Our requirements were to make a unique, tasty, summertime beer.
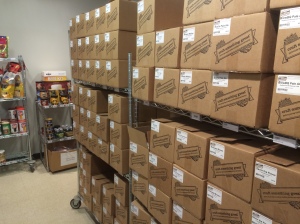
Great Fermentations was very busy, so we scurried over to the shelves of brew kits to deliberate. We quickly ruled out an IPA (Jesse: “Too heavy.”) and settled on a Cream Ale. This recipe uses some ingredients we’ve never worked with before (maltodextrin and rice powder) but we weren’t fazed. We feel we work best when we have no idea what we’re doing.
A quick Kroger run supplied us with five gallons of water meaning we were good to start in earnest.
Step 2: Sanitization
This step of the brew process is not sexy. Well… in a way it is. Yeast only produces alcohol when conditions are just right. Bacteria living on the surfaces that the young beer touches will produce off flavors or could halt fermentation outright. To make sure the yeast is good to… make love (reproduce and create ethanol) everything gets sterilized.
There’s a joke in there about clean apartments and first dates, but I’ll let it go.
Step 3: Make Some Tea (Wort)
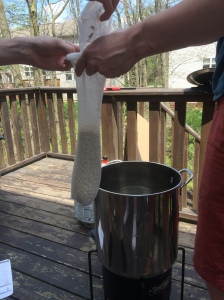
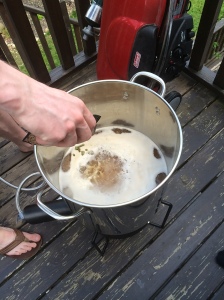
Now that everything is good and tidy, it’s time to heat up a couple gallons of water and steep some grains. This part of brewing is literally exactly like making tea in the morning. The only difference is that you’re using cracked grains rather than leaves and you’re less likely to groggily pour the hot water into a potted plant rather than your mug. The end product is called “wort” (also known as young beer).
Joe and Alex bring the temperature of the water into the 160-170 degree range and drop the grain sock into the water. Steeping can take up to an hour, so we crack a few pre-made beers and sit back.
Step 4: Boil, Baby, Boil
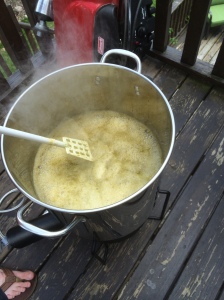
45 minutes later the wort is ready to undergo the boil. I was originally surprised when I started homebrewing at just how scientific the process actually is. Homebrewing is more chemistry experiment than barbecue.
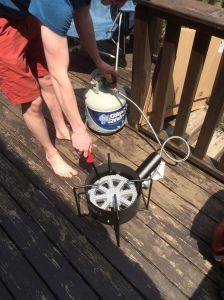
For instance, this stage of the brewing process is all about breaking down chemical compounds, caramelizing sugars, and making the wort suitable for fermentation. The heat from the burner alters simple sugars giving your beer good color and different flavors. Longer boils reduce the ph and bacteria levels in the wort so that yeast can live comfortably. Finally, the heat can get rid of hop oils that may be too harsh tasting otherwise (it’s important to have excuses prepared in case your beer tastes terrible)..
The boil is actually the most important for making sure your beer tastes good. You add hops (rhizomes in the cannabis family) for an herbal flavor and usually in several stages depending on how you want the final product to turn out. Our beer adds hops at the beginning for flavor and at the very end. Any hops added at the end are purely aromatic. Cream ales aren’t particularly hoppy, so other ales could have as many as four stages of hop addition.
This bit takes a while so I suggest sampling another beer for “inspiration.”
Step 5: Cool, Pitch, Seal
If you’re asleep at this step I wouldn’t blame you. The combination of time, alcohol, and radiating heat from the propane burner is nap-inducing; however, it’s time to look alive. The end of the boil signifies a need to act fast.
It is extremely important to bring the wort down about 110 degrees as fast as possible. Back in our early days, we would brew in the winter. This meant our cooling process was shoving the pot in a snow mound and waiting. We did not make good beer.
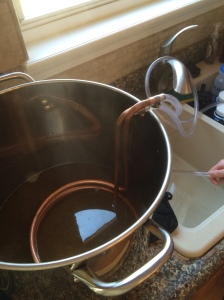
Now we have a toy called a “wort chiller” which is essentially a copper heat exchanger. Cold water runs through the copper tubing lowering the temperature in a quick 10 minutes. Wort chillers are fun toys to use. Hobbyists are nerds.
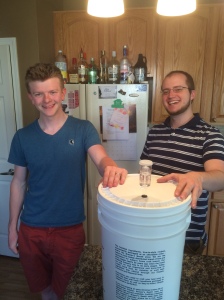
Finally, it’s time for us to pitch the yeast. We transfer the chilled wort into the fermentation bucket, chuck in the yeast, and take the OG (original gravity). We’ll check the OG again after laughing about West coast rappers and the first fermentation to see how alcoholic our beer is.
Step 6: Wait
The sealed bucket is now ready to sit in a cool, dark place for a few weeks to ferment. At this point, you can only hope that you did everything correctly and in the right order. It’s nerve wracking, but that’s part of the appeal of brewing. It’s a lot of work and the payoff doesn’t come for a while, but it’s a damn good excuse to drink, chill, and participate in a culture that makes Indy great.
Check back next time for Part 2 when we’ll keg the beer, chill it, and drink it! Cheers!
Written by: Brian Banta











One thought on “The Great Brewventure!”